ANY Process Demo: WMS Shipment
Overall Process Flow
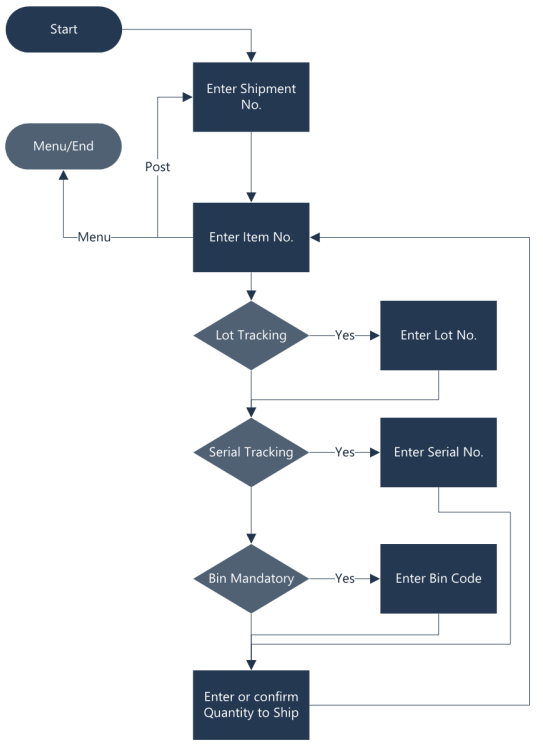
Steps
Make sure you have already set up the prerequisites for this process.
Handling a picked shipment.
In the WMS Pick demo script, a Warehouse Shipment (SH000005) was created for the related warehouse Pick. This part of the demo script will guide on how to handle a picked Warehouse Shipment.
| Step | Illustration |
|---|---|
| 1. Select the Warehouse Management button in the menu, and select the WMS Shipment button in the WMS Menu |  |
| 2. The next screen appears. | 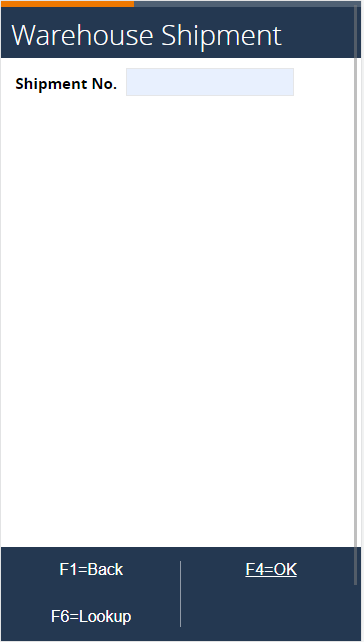 |
3. Choose F6=Lookup and select the completely picked Shipment (SH00005) or enter the Shipment Number. Confirm by pressing F4=OK. |
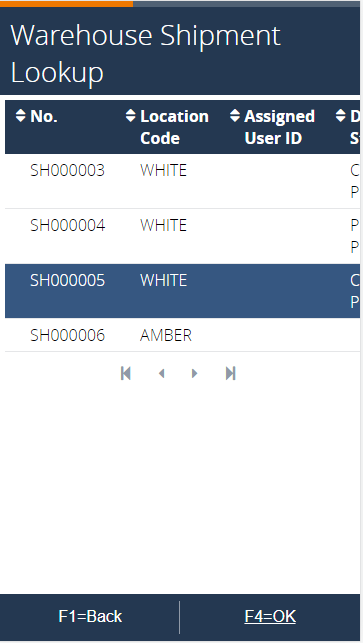 |
| 4. The shipment details are shown | 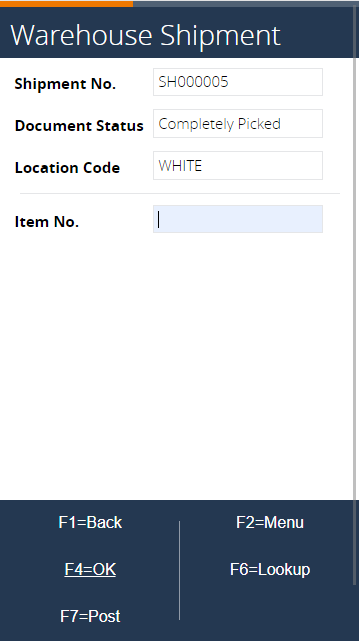 |
| 5. Enter an item number or select a line from the lookup. An error pops up stating that the pick has handled everything. | 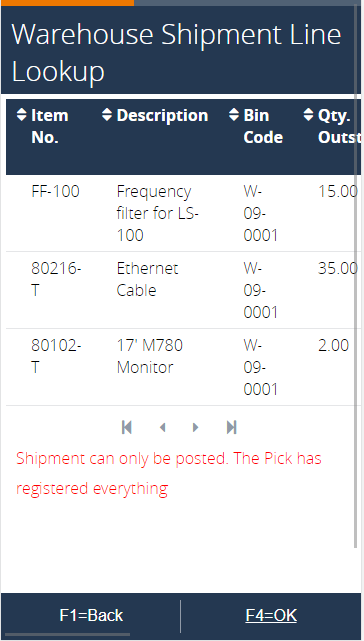 |
6. Go back and press F7=Post to post the shipment. Since the Pick has already registered all tracking and shipping data, there is no use to go through the full process. In Business Central, go to the shipped order 1001 and click on Navigate > Shipment. 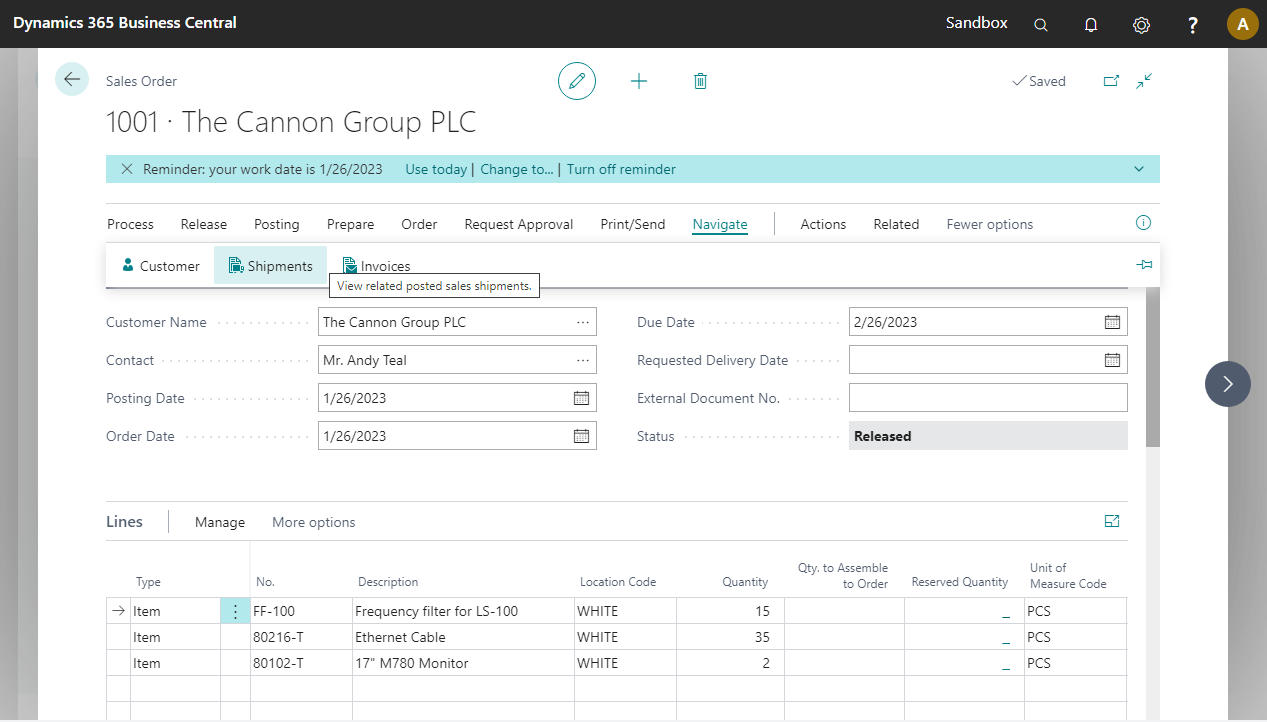 | |
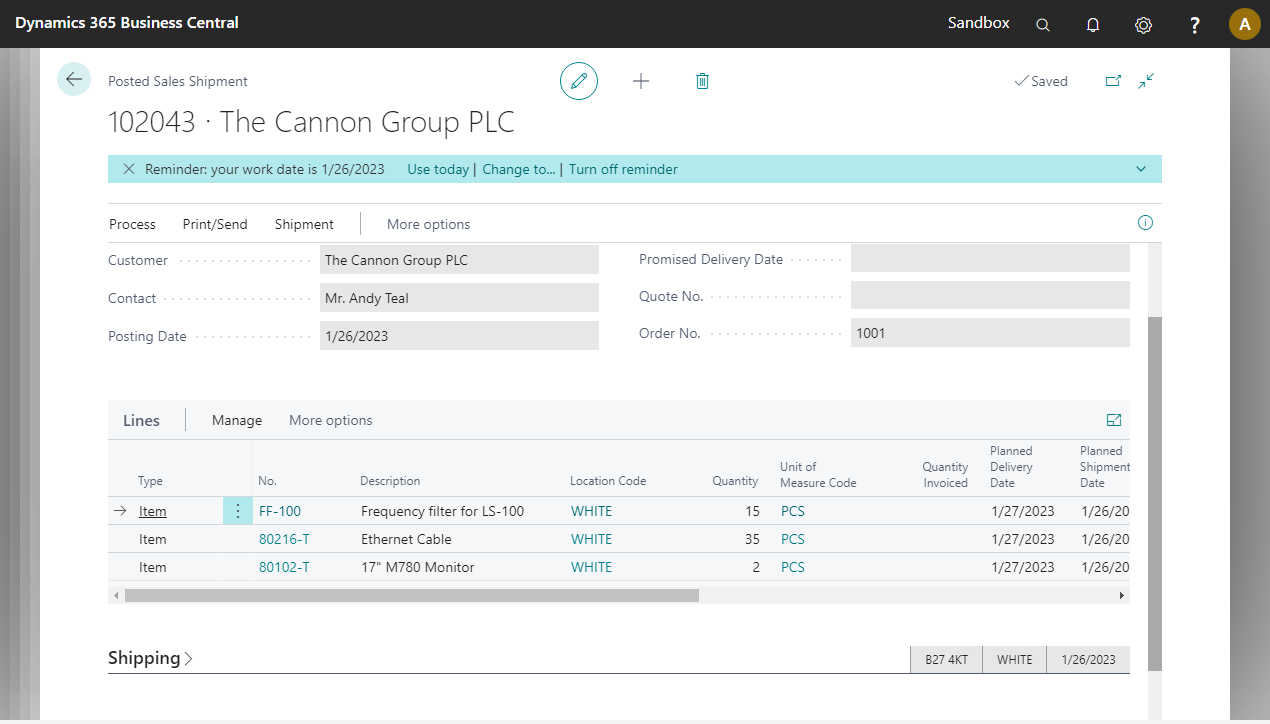
| 7. Open the related posted shipment. You can see the details of the posted shipment. | |
Handling an non-picked shipment
| Step | Illustration |
|---|---|
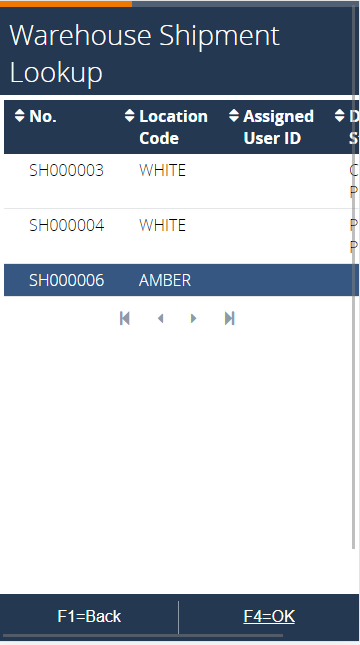
8. The process returns to the start screen. Enter the shipment for location AMBER or use the lookup to select it from the list. |
 |
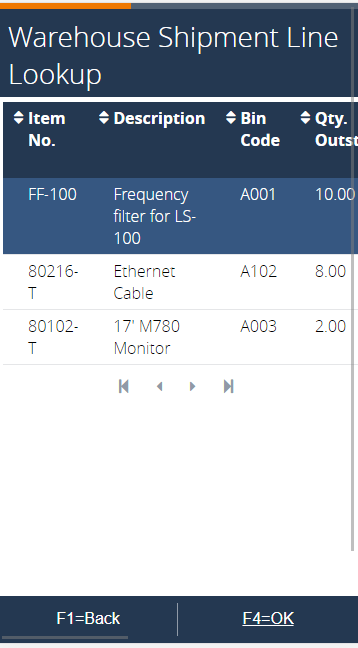
9. In the next screen, select item FF-100. |
 |
| 10. The next screen requests the bin where the item will be shipped from, confirm the suggested bin. | 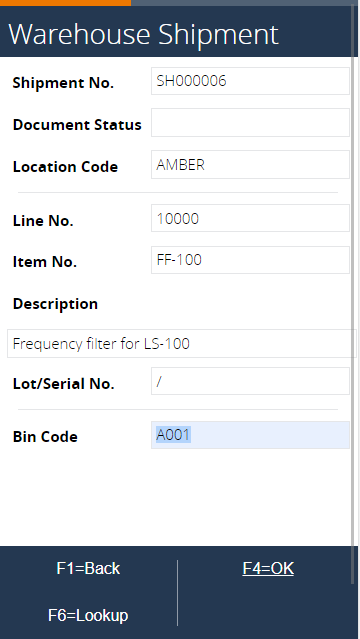 |
| 11. The following screen requests the amount to be shipped, the total quantity to ship is suggested. Enter the quantity to ship and press F4=OK. | 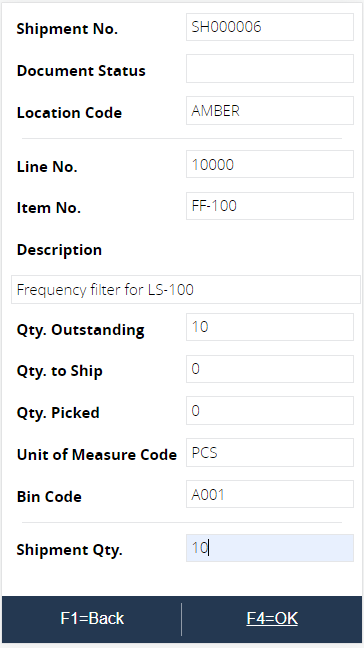 |
12. After confirming the quantity, the shipment line is updated in the warehouse shipment. The bin and quantity are updated. In Business Central, open the Warehouse shipment to see it has been updated. 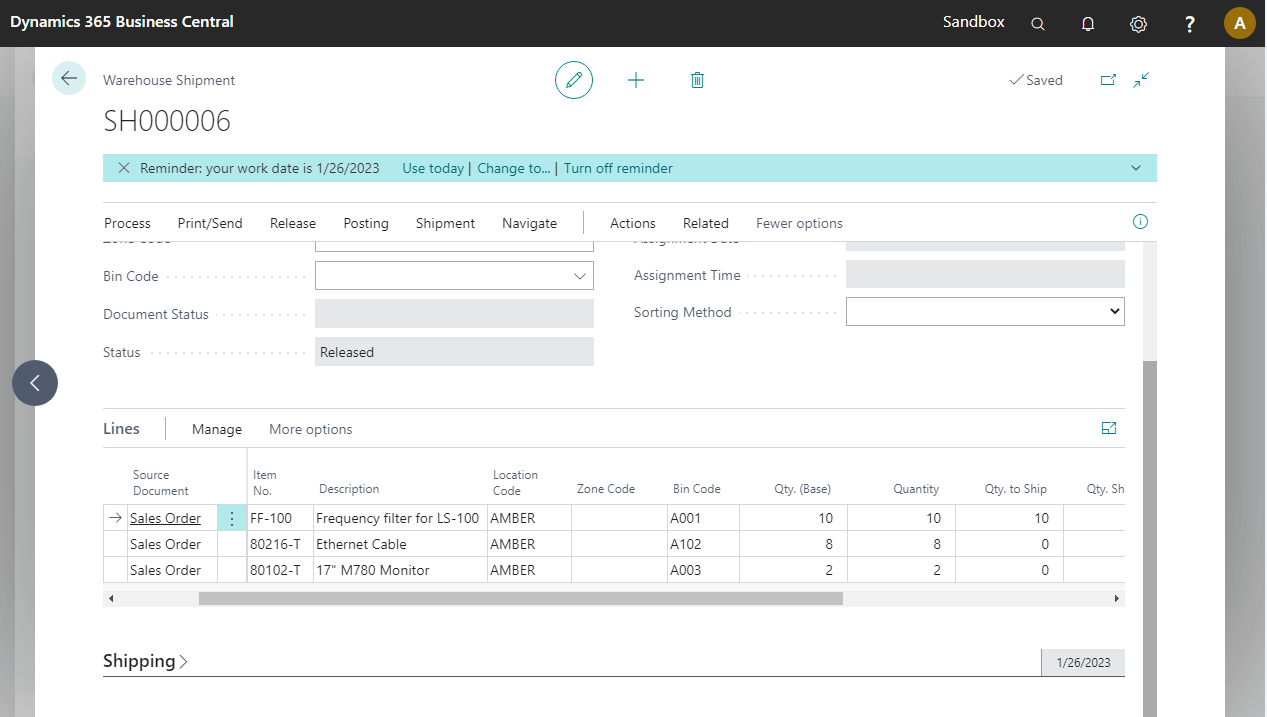 | |
| 13. Back at the item screen, select the second item (80216-T) using the lookup. | 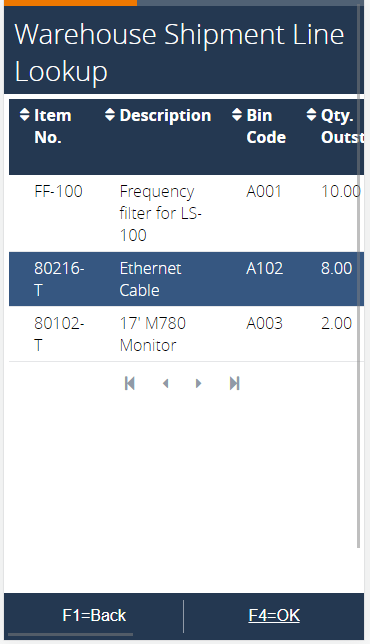 |
14. The next screen requests the lot number, since this item is lot-tracked. Enter the lot number to be shipped, or use F6=Lookup to select one of the available lots on location AMBER. Confirm with F4=OK. |
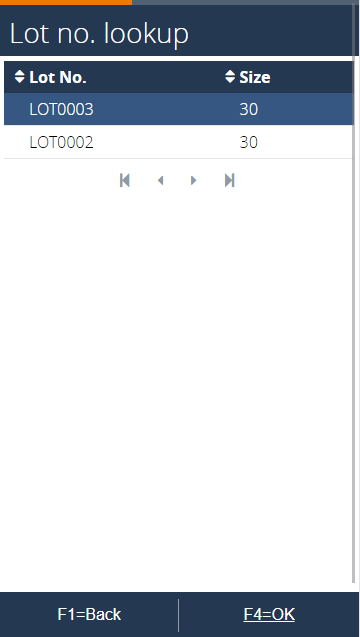 |
| 15. In the next screen, the Bin code is requested. When using the lookup, the view is filtered both on the location and the Lot number, showing only the bins that contain the selected lot number. | 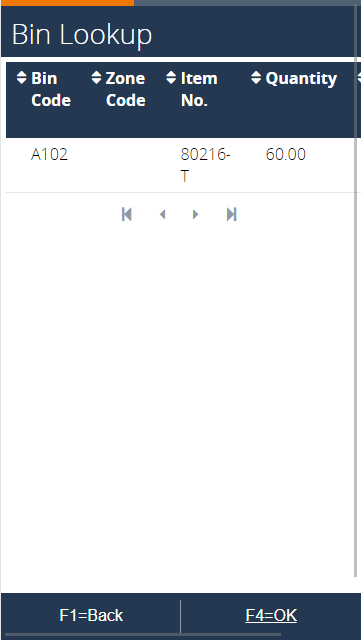 |
16. Lastly the quantity to ship is requested. Enter it and confirm with F4=OK. |
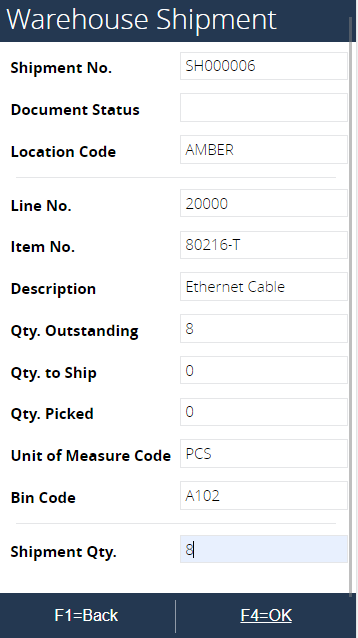 |
17. After confirming the quantity, the second line in the warehouse shipment is updated. The lot number can be checked via Line > Item Tracking Lines. 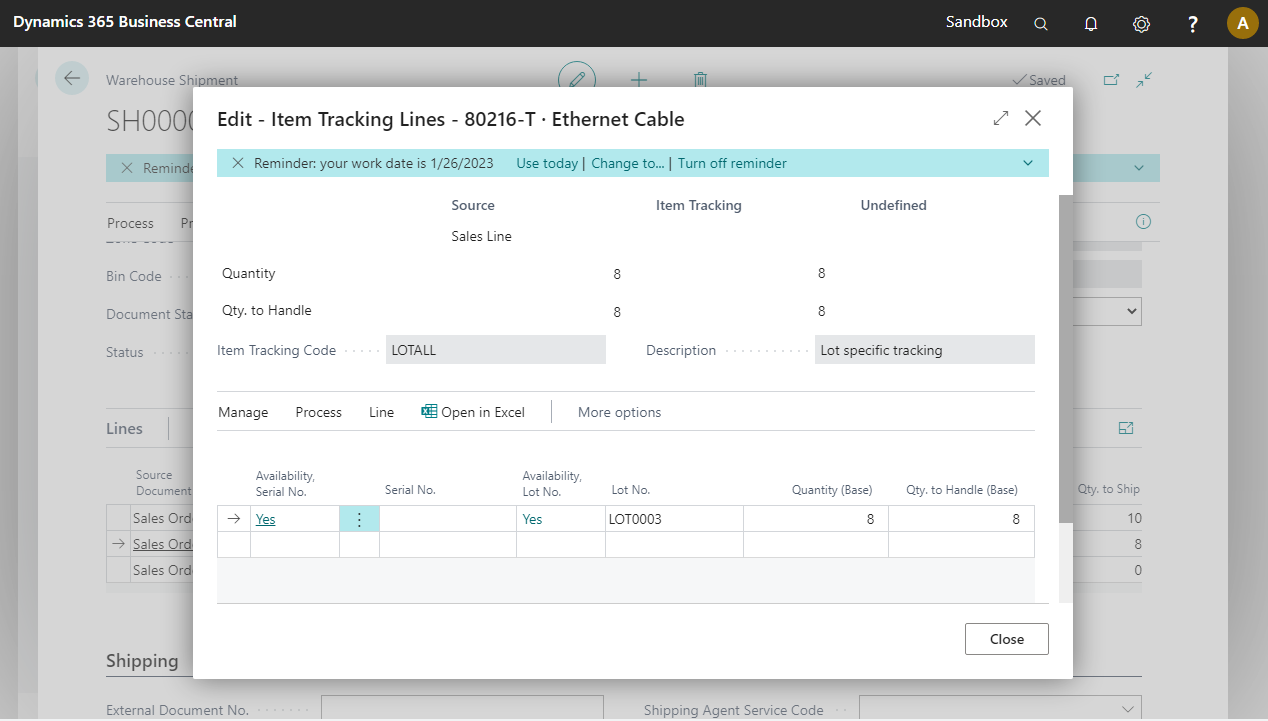 | |
| 18. The process returns back to the scan item activity. Select the last item using lookup. | 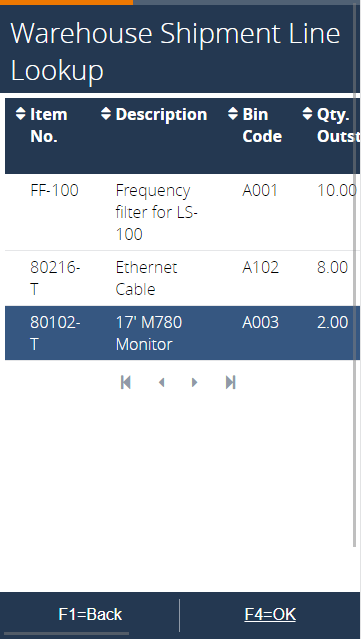 |
19. Because item 80102-T is serial tracked, the next screen requests the serial number. Select a serial number from the list via F6=Lookup, afterwards confirm with F4=OK |
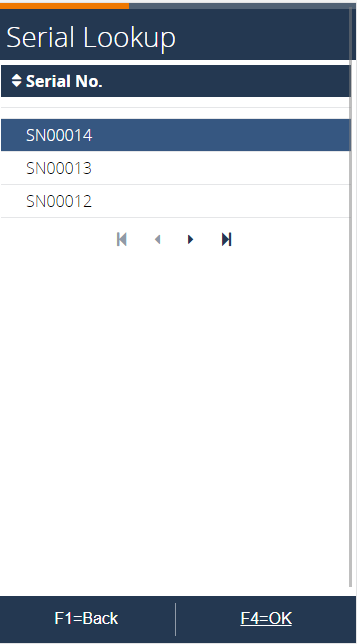 |
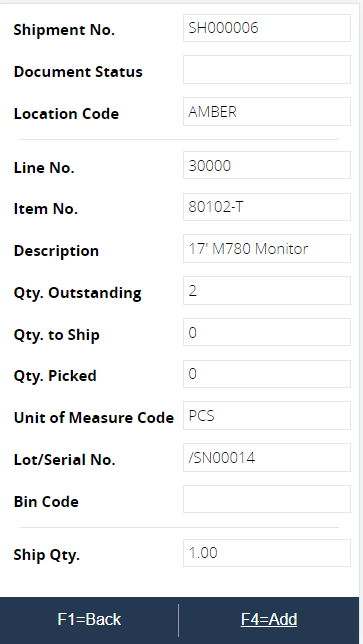
20. Confirm the selection in the next screen. The select bin step is skipped because 1 serial can only be in one bin, and the quantity to ship is also fixed on 1. Press F4=Add to mark the serial number for shipping. |
 |
| 21. The process returns to the select serial number screen, because the quantity to ship is less than the total outstanding quantity. Select the same serial number again for shipping. An error will show when you select or scan the same serial number. | 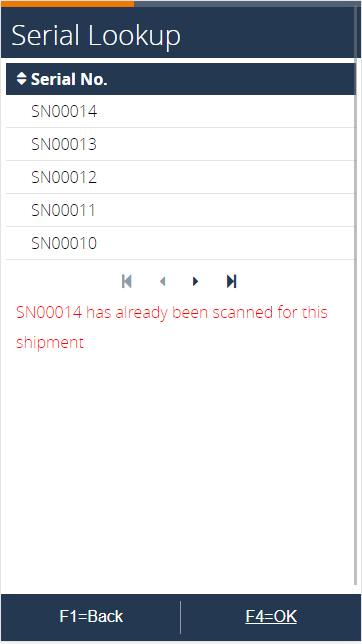 |
| 22. Select a different serial number and confirm it in the next screen. | 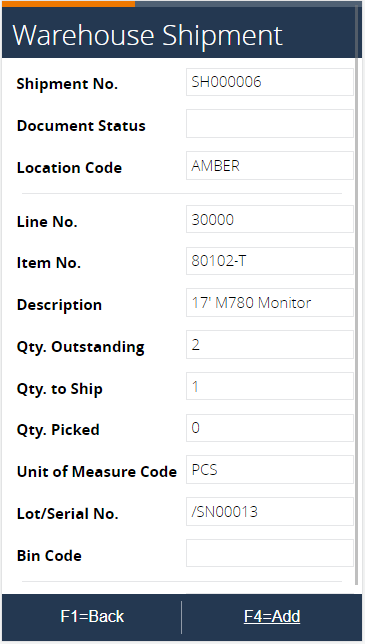 |
| 23. Because the outstanding quantity matches the qty. to ship, the process arrives back at the item code activity. | 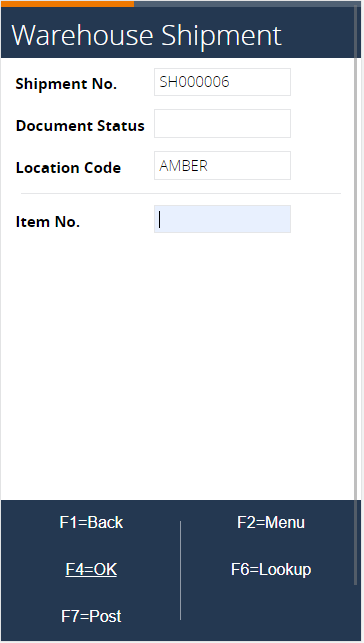 |
24. After each time F4=Add was pressed, the warehouse shipment line was updated. Open the warehouse shipment in Business Central. Select the third line and press Line > Item Tracking Lines. 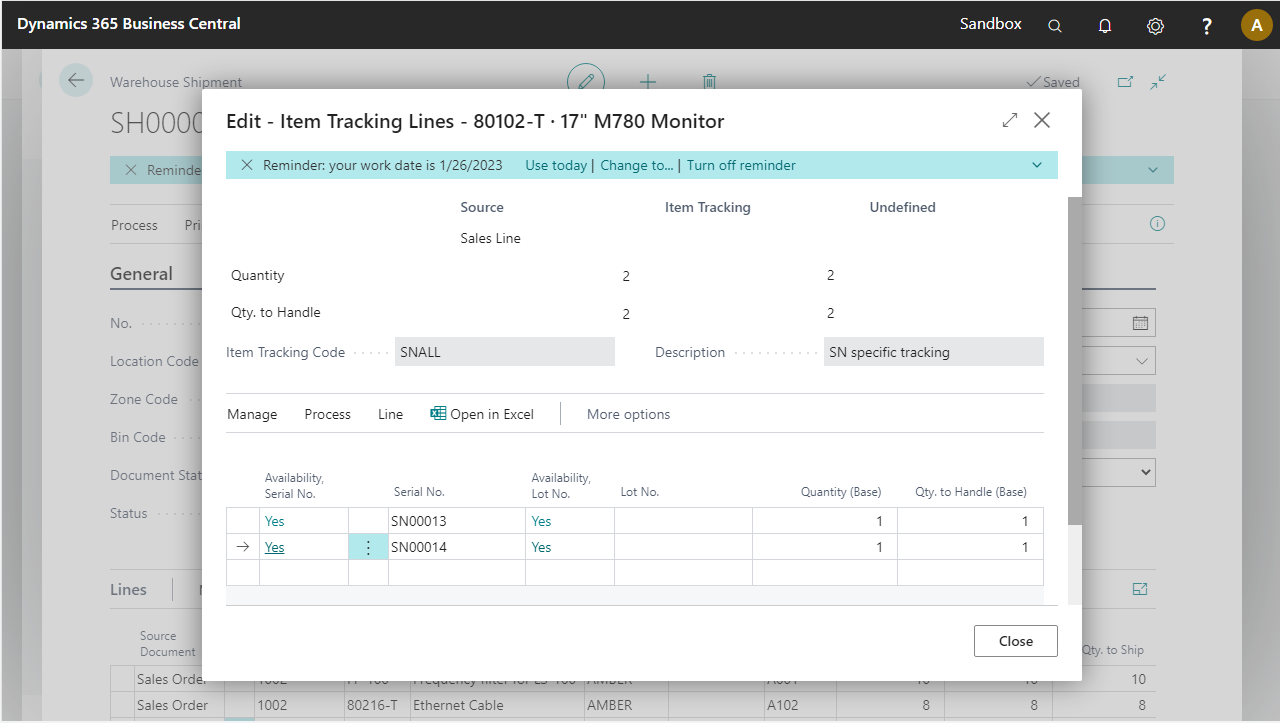 | |
25. Back in the process, post the shipment using F7=POST. This will post the shipment. This can be checked via the Navigate > Shipment action in the Amber sales order. 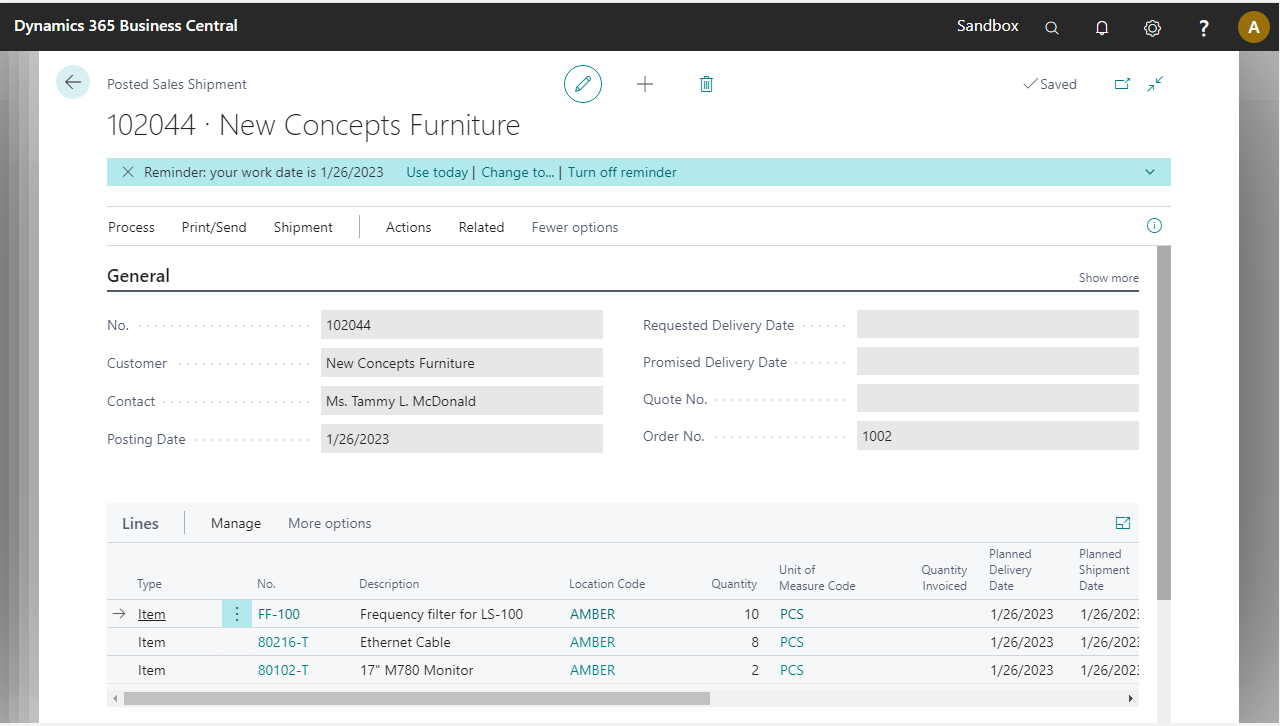 | |
