Working with Excel Layouts
Excel report layouts are based on Microsoft Excel workbooks (.xlsx files). They let you create reports by using familiar Excel features for summarizing, analyzing, and presenting data, like formulas, PivotTables and PivotCharts.
This article explains some of the most important things you need to know to get started with Excel layouts.
Why use Excel layouts?
Here are some more benefits of using Excel layouts:
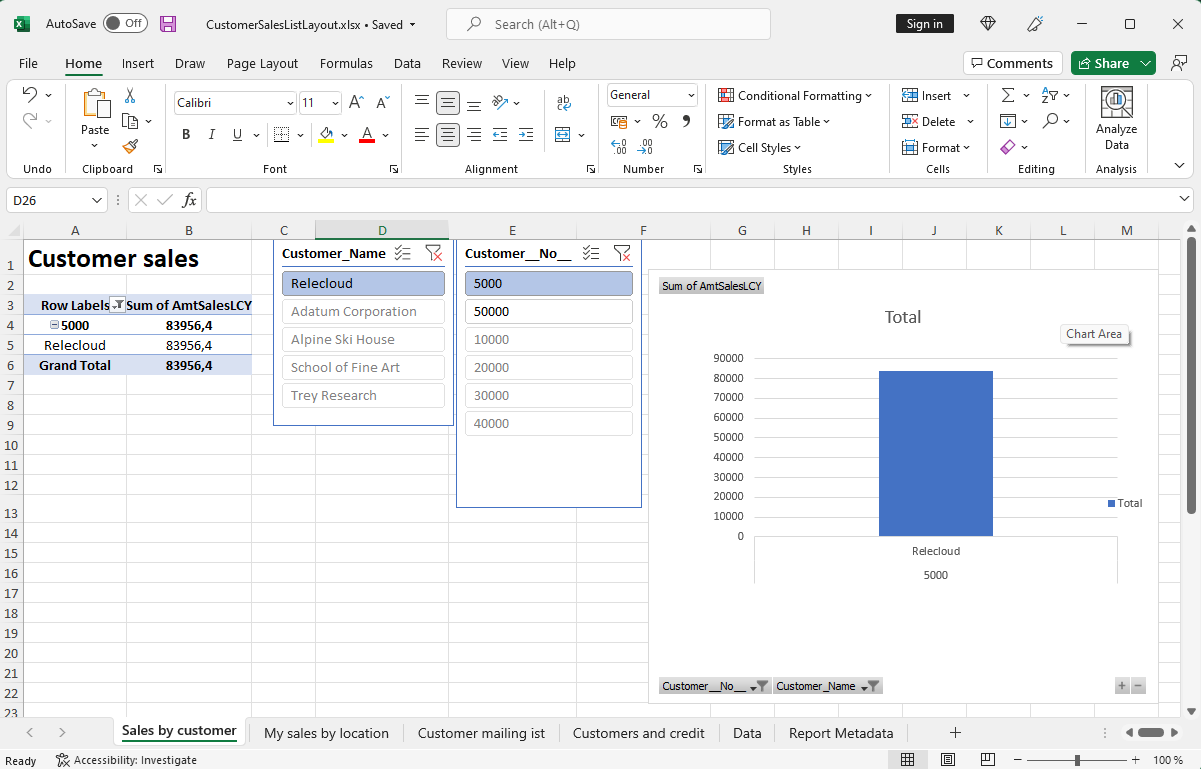
- Create interactive reports using visualizations like slicers
- View raw data from the report dataset to help understand how the report works and where the data on visuals comes from
- Use built-in Office features to do post-processing on rendered reports, like:
- Use installed add-ins and app integrations, like Power Automate flows or OneDrive.
Get started
There are basically two tasks involved in setting up an Excel layout on a report:
- Create the new Excel layout file.
- Add the new layout to the report.
Task 1: Create the Excel layout file
There are three ways to create an Excel layout file for a report as explained in this section
From any report
You can use the following steps to create an Excel layout from any report, regardless of the current layout type. The Excel layout will contain the required Data sheet and table, a Report Metadata sheet, and nothing else.
1. Choose the  icon, enter Report Layouts, and then choose the related link.
The Report Layouts page appears and lists all the layouts currently available for all reports. 2. In the Report Layouts list, select any layout for the report, then choose the Run Report action. 3. On the report request page, select Send to > Microsoft Excel Document (data only) > OK.
This step downloads an Excel workbook that contains the report dataset. 4. Open the downloaded file in Excel, make changes, then save the file.
From another Excel layout on a report
If there's already an Excel layout for a report, you use the existing layout as a starting point. There are two approaches to getting a copy of the layout. You can export the existing layout from the Report Layouts page or download the layout from the report's request page. Both ways download an Excel layout file that includes all the sheets of the existing file. The difference is that from request page, the layout will include actual data. The data isn't required but it helps when designing the layout.
Approach 1: Export the layout from the Report Layouts page
1. Choose the icon, enter Report Layouts, and then choose the related link.
The Report Layouts page appears and lists all the layouts currently available for all reports. 2. Select the Excel layout from the list, then choose the Export Layout action from the top of the page. 3. Open the file in Excel, make the changes, then save the file.
Approach 2: Download the layout from the report's request page
1. Choose the icon, enter Report Layouts, and then choose the related link.
The Report Layouts page appears and lists all the layouts currently available for all reports. 2. In the Report Layouts list, select any layout for the report, then choose the Run Report action. 3. On the report request page, select Download. 4. Open the file in Excel, make the changes, then save the file.
From AL code
This way is the most advanced. It requires knowledge of AL code, so it target programmers. The Excel layouts, in this case, are part of an extension package that you install. For more information, see Creating an Excel Layout Report in the Developer and IT Pro help.
Task 2: Add the Excel layout to the report
Once you have the Excel layout file, the next task is to add it as a new layout for the report.
1. Choose the icon, enter Report Layouts, and then choose the related link.
The Report Layouts page appears and lists all the layouts currently available for all reports. 2. Select New Layout. 3. Set the Report ID to report. 4. Enter a name in Layout Name. 5. Set Format Options to Excel. 6. Select OK > Choose to open file explorer on your device. 7. Find and select the Excel file, then select Open.
The selected file is uploaded to the layout, and you return to the Report Layouts page. 8. If you want to see how the report looks with the new layout, select the layout in the list, then select Run Report.
Understanding Excel layouts
There are few things you should know or consider when you start creating or making changes to Excel layouts. Every Excel layout must include a two elements: a Data sheet and a Data table. These elements form the basis of the layout by defining the business data from Business Central that you can work with. You can think of the Data sheet as a kind contract between the layout in the business data. You'll use this data as the source of calculations and visualizations that you want to present on other sheets.
There are some specific requirements to the structure of the Excel workbook. If the requirements aren't met, you'll have problems using the layout. The following diagram and table outline the elements of an Excel layout and the requirements.

| No. | Element | Description | Mandatory |
|---|---|---|---|
| 1 | Data sheet |
|
 |
| 2 | Data table |
|
|
| 3 | Presentation sheets |
|
|
| 4 | Report Metadata sheet |
|
To summarize what you can and can't do on the Data sheet:
- Don't change the name of Data sheet, Data table, or columns.
- You can delete or hide columns.
- Don't add any columns unless they're included in the report dataset.
- You can place the sheets in any order. For example, the Data sheet can be first or last.
See Related Training at Microsoft Learn
See Also
Managing Report Layouts
Change the Current Report Layout
Import and Export a Custom Report or Document Layout
Working with Reports, Batch Jobs, and XMLports
Prepare Financial Reporting with Account Schedules and Account Categories
Business Intelligence
Working with Business Central
Analyzing Report Data with Excel.
--- author: edupont04