ANY Process Demo: WMS Move Inventory
Overall Process Flow
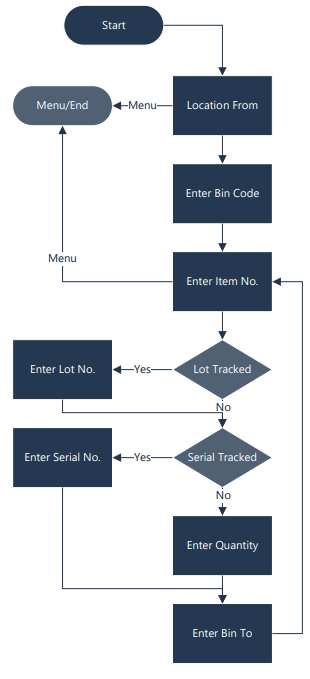
Steps
Make sure you have already set up the prerequisites for this process.
| Step | Illustration |
|---|---|
| 1. Select the Warehouse Management button in the menu, and select the WMS Move Inventory button in the WMS Menu. | 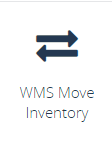 |
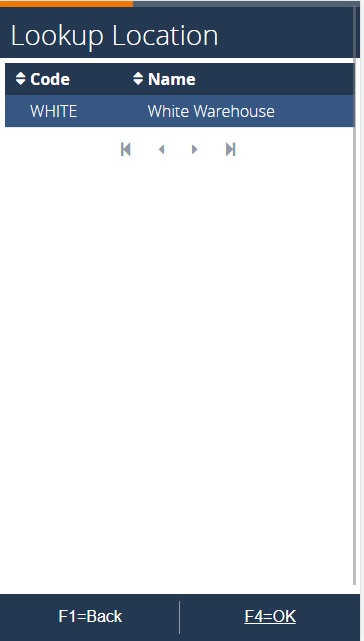
2. The following screen appears. Enter location WHITE, or use F6=Lookup to select the location from a list of locations where Directed Put-Away and Pick is true. Confirm with F4=OK. |
 |
| 3. The next step requests a bin. Enter a non-empty bin or use F6=Lookup to show a list of all the bins with content. The items are also displayed to make it easier for a user to select the correct bin. Go to the next step with F4=OK. For this demo, select a bin where item LS-150 is located. | 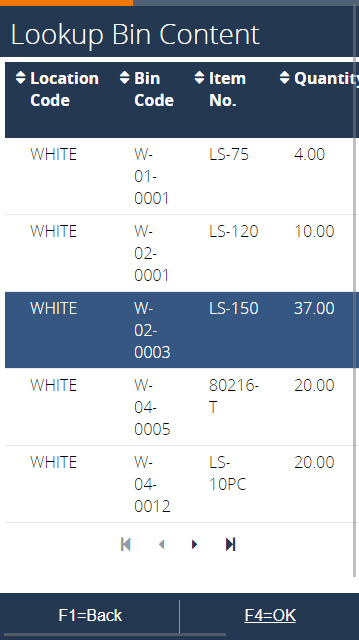 |
| 4. After the bin is confirmed, an item code can be entered. Enter item LS-150 or use F6=Lookup to show a list of the contents of the bin. | 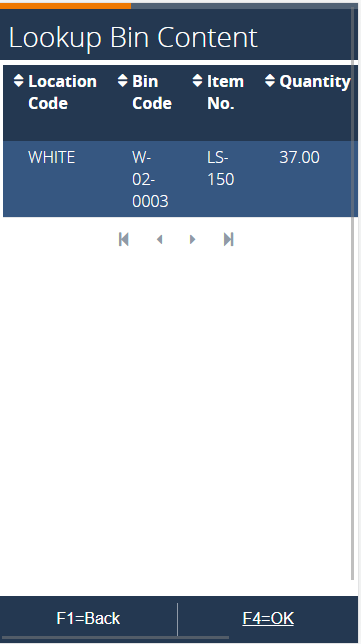 |
| 5. The following step requests the quantity to move. Entering a quantity exceeding the available quantity will yield an error. Enter a quantity (e.g. 1) and press F4=OK to continue. | 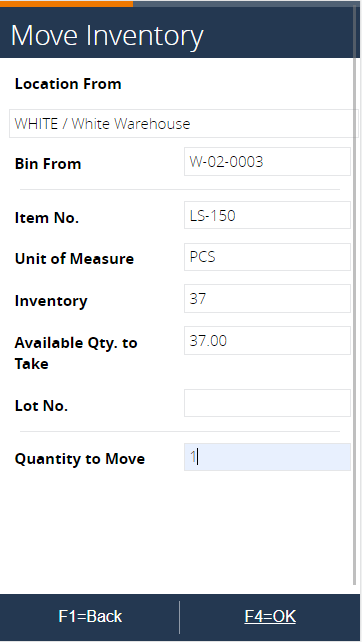 |
| 6. Now enter a bin to place the item in. Use F6=Lookup to select a bin. Press F4=OK to finish the move. | 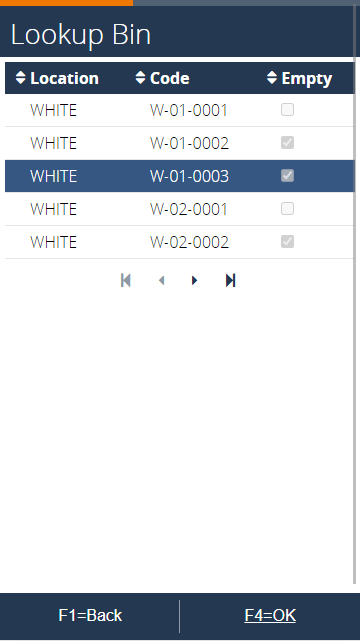 |
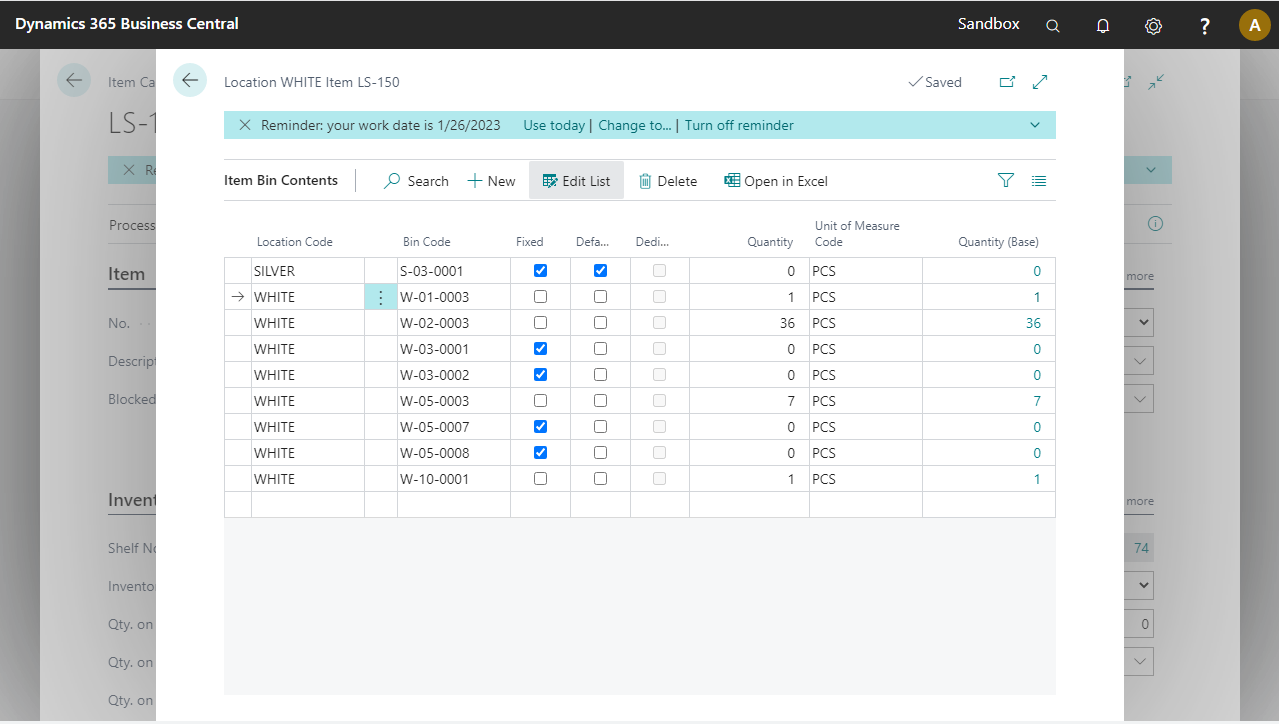
7. When the previous step is completed, a new warehouse journal line is generated and scheduled to post via the job queue. Posting usually happens in a matter of seconds. The results can be showed in Business Central. Go to the LS-150 item card and click on Related > Warehouse > Bin Contents. In the screen that pops up, there is 1 piece of LS-150 present in bin W-01-0003. |
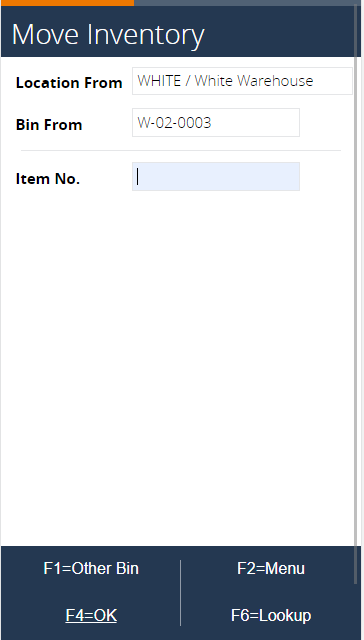
8. The process has returned to the select item activity. Since only item LS-150 is available in that bin, press F1=Other Bin to go back to the select bin code activity. |
 |
|
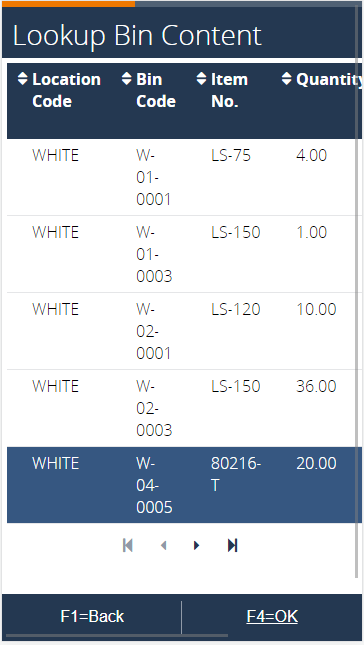
9. In the select bin code activity, search for the bin to which item 80216-T has been added via F6=Lookup. |
 |
|
| 10. Next, enter the item no. 80216-T, or use F6=Lookup to select it from the list. Continue with F4=OK. | 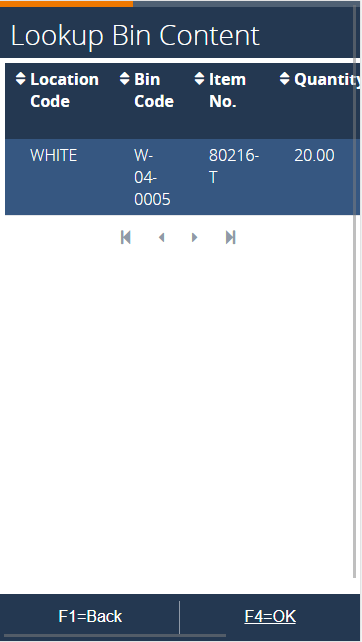 |
|
| 11. The following screen asks for the Lot number. Enter one of the lot numbers, or use the list again to select the Lot number. | 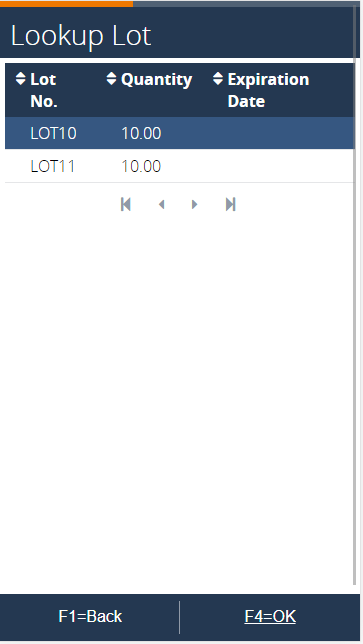 |
|
| 12. The following step requests the quantity to move. Enter a quantity (e.g. 2) and press F4=OK to continue. | 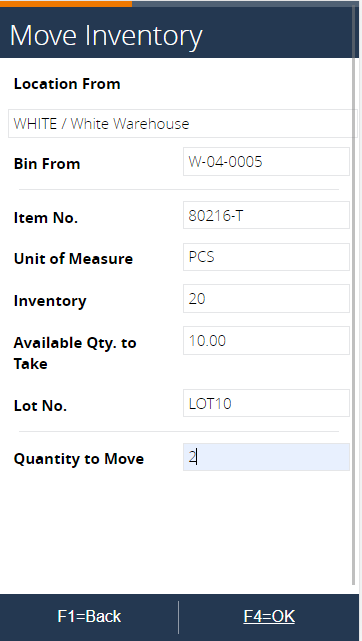 |
|
| 13. Before we can make the move, we must enter the bin to which the item is moved. Enter a bin and finish the move by pressing F4=OK. | 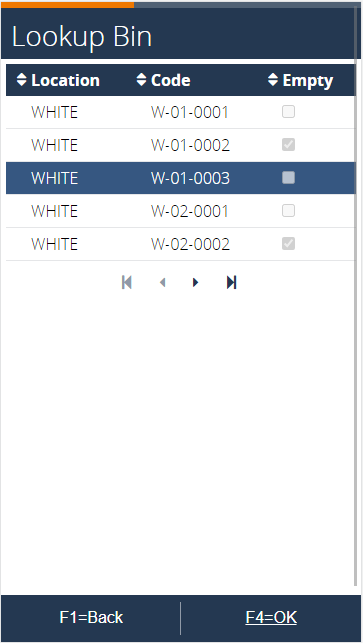 |
|
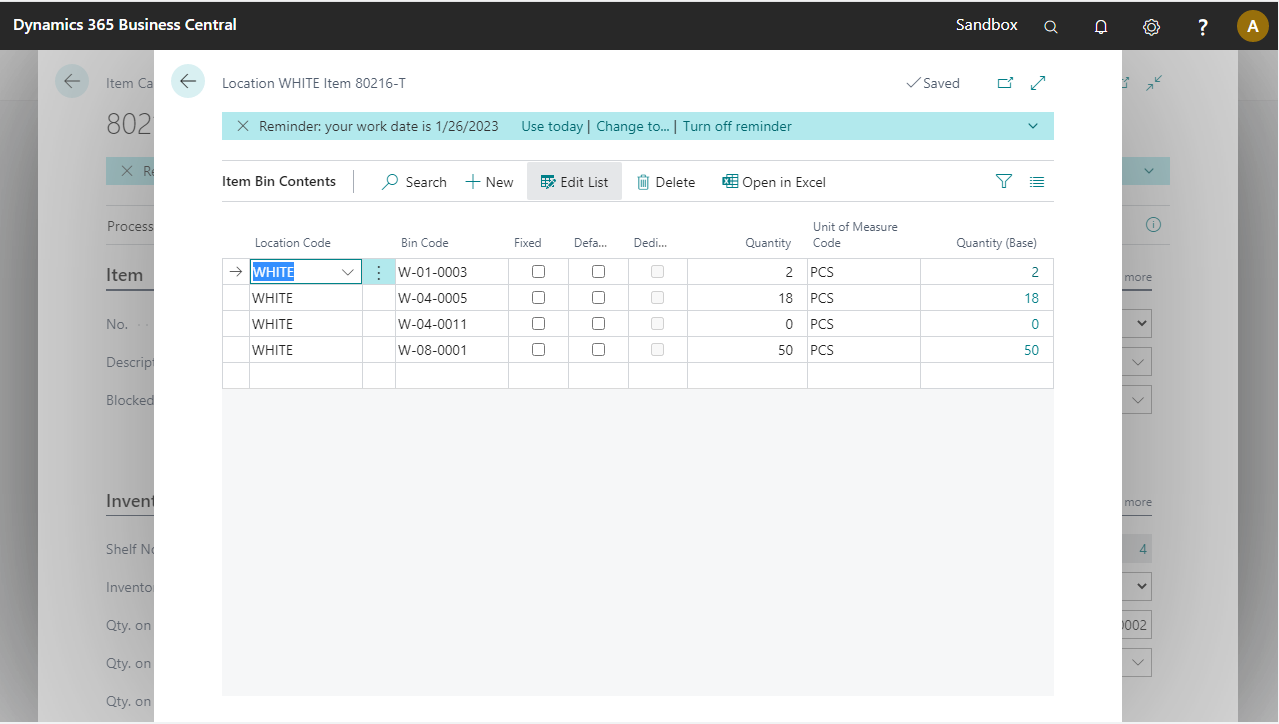
14. When the previous step is completed, a new warehouse journal line is generated and scheduled to post via the job queue. Posting usually happens in a matter of seconds. The results can be showed in Business Central. Go to the 80216-T item card and click on Related > Warehouse > Bin Contents. In the screen that pops up, the moved inventory is shown. |
